In this comprehensive guide we will be building ktor server to send emails using gmail SMTP server. We will be using koin for dependency injection. We will be structuring our project sticking to some clean architecture principle.
SMTP, or Simple Mail Transfer Protocol, serves as the backbone of email communication, facilitating the transfer of messages between email servers. As the cornerstone of the email delivery process, SMTP ensures the reliable transmission of emails across the internet.
Gmail does provide a free SMTP service as part of its suite of email services. This service allows us to send emails through Gmail’s servers using our Gmail account credentials. So for this project we’ll be using Gmail’s server.
Generating ktor project
If you’re using IntelliJ Ultimate, creating a Ktor app is a breeze right within the IDE itself. However, for those of us using the Community Edition, we can head over to start.ktor.io to kickstart our project. By selecting the necessary plugins and configurations, we can generate a new project tailored to our requirements. Additionally, for a quick start, you can access the initial project with just the required dependencies directly from the initial branch of the GitHub repository.
For those who prefer to generate a new project rather than obtaining the initial project from GitHub, follow these steps:
-
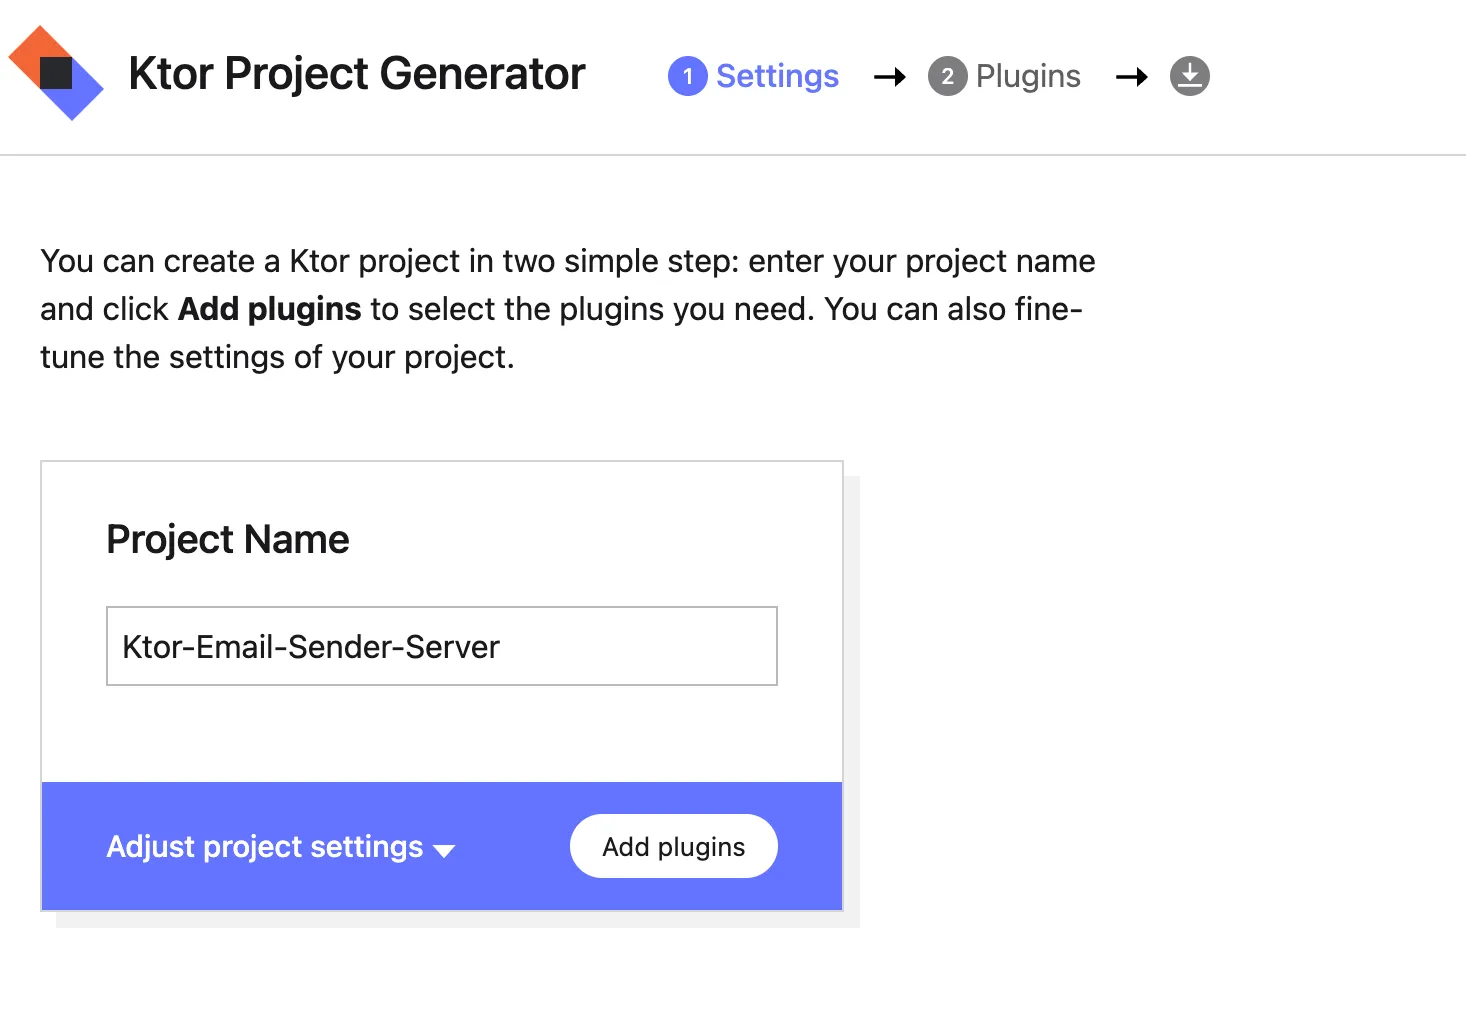
Go to start.ktor.io and give a name to your project
-
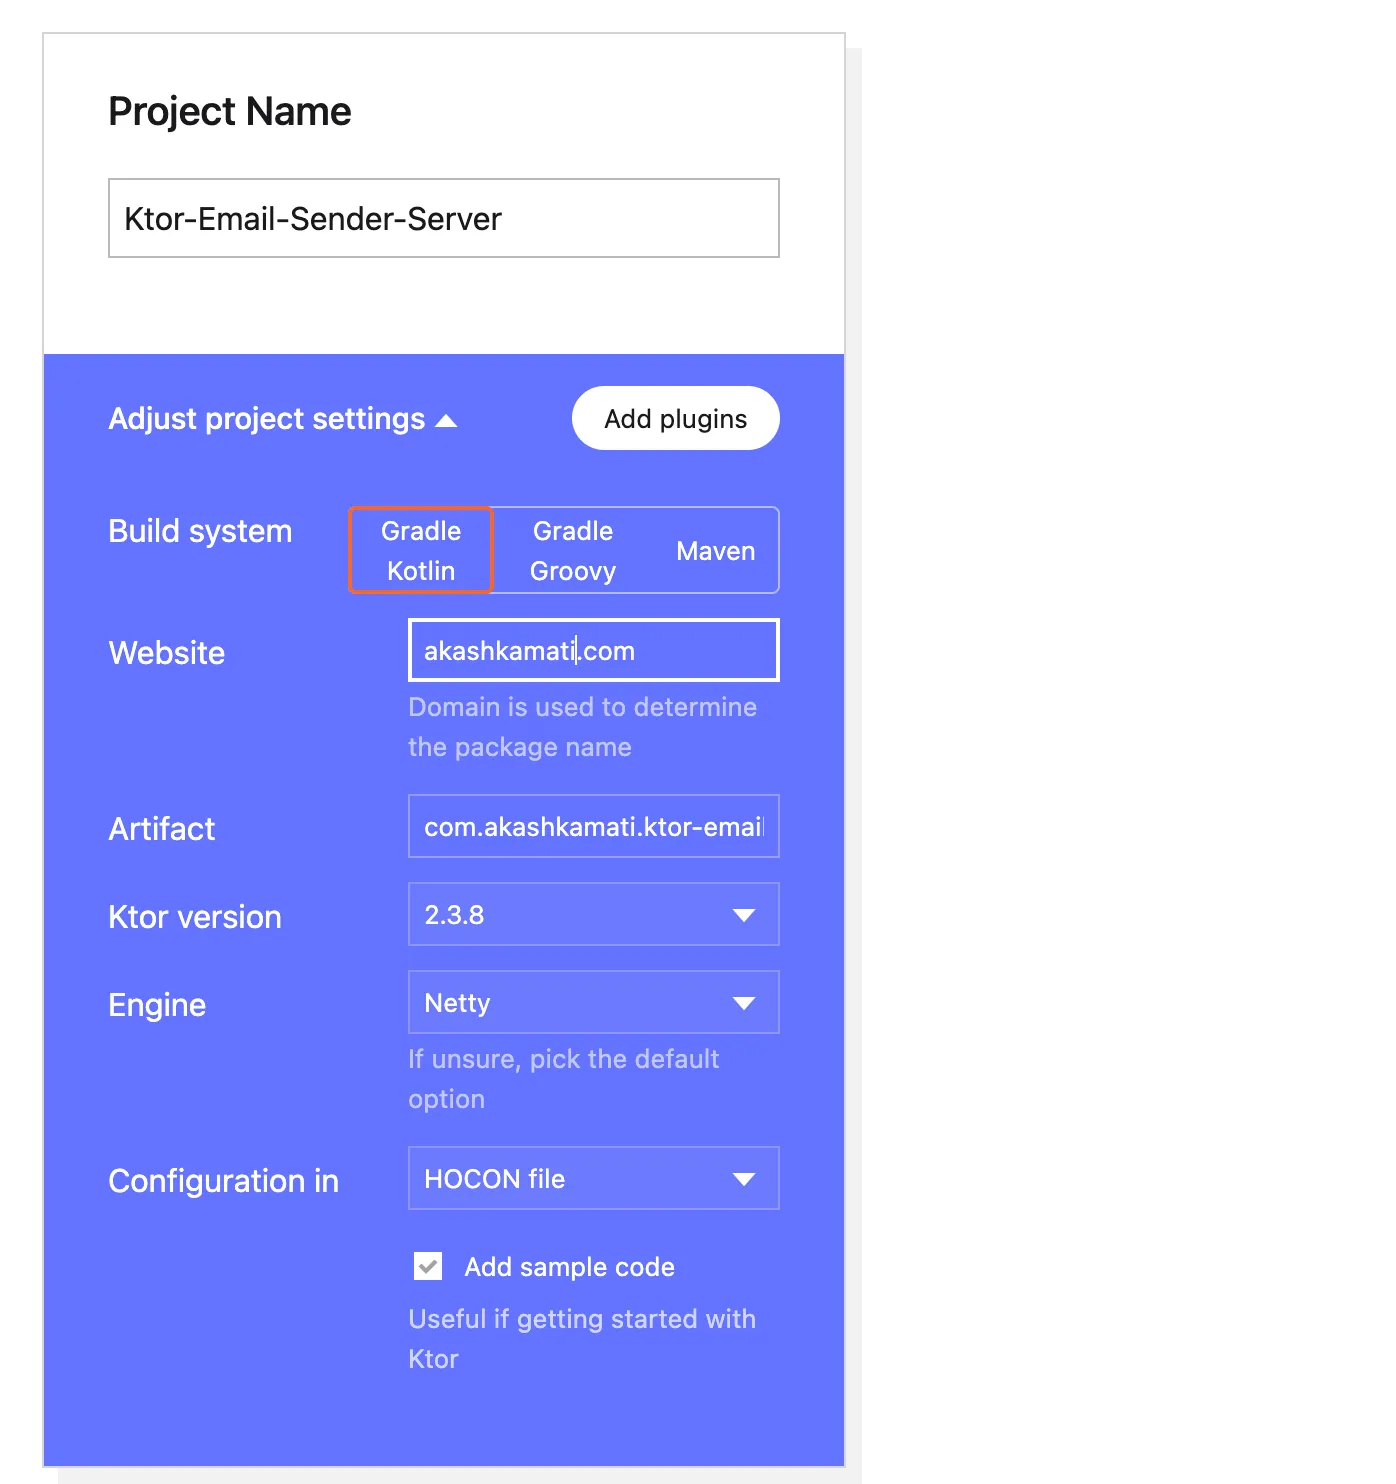
Now we can adjust our project settings
-
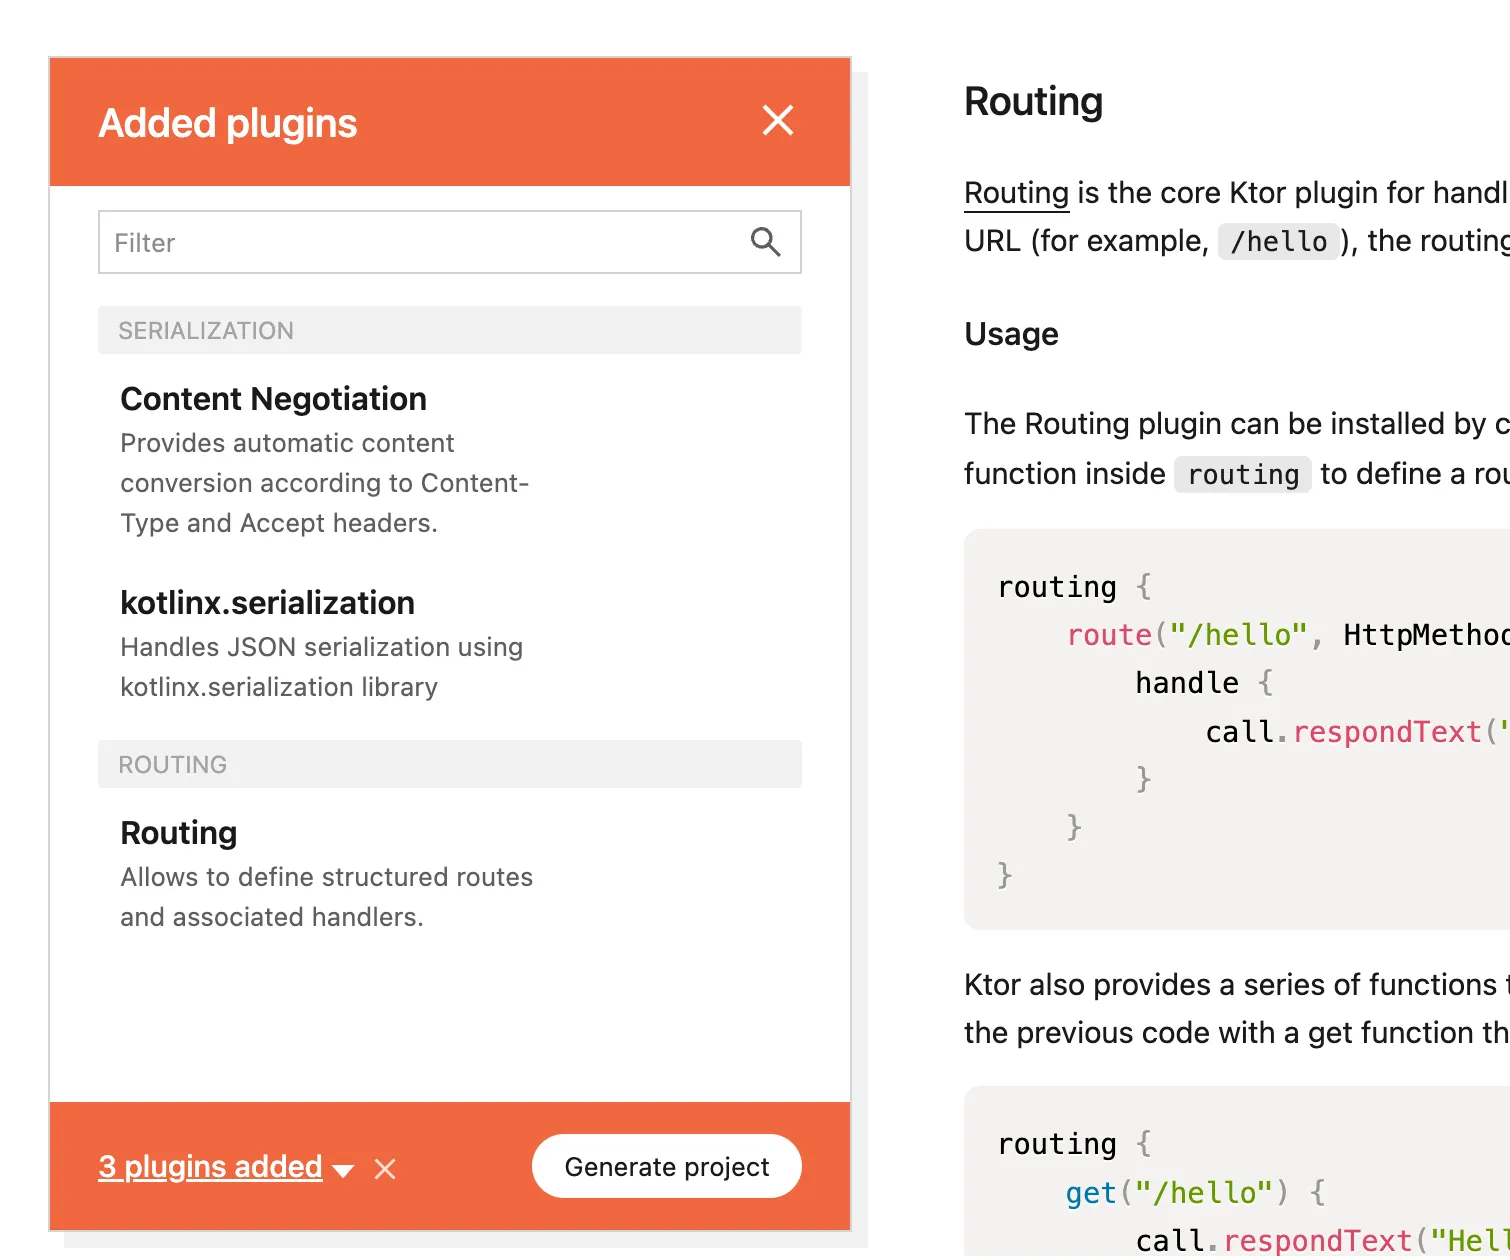
Now, we can add these plugins by clicking on ‘Add Plugins’. Later, these plugins can also be added as dependencies in build.gradle.kts.
-
Download the zip file, unzip then open project in Intellij
Now, let’s take a closer look at the generated code.
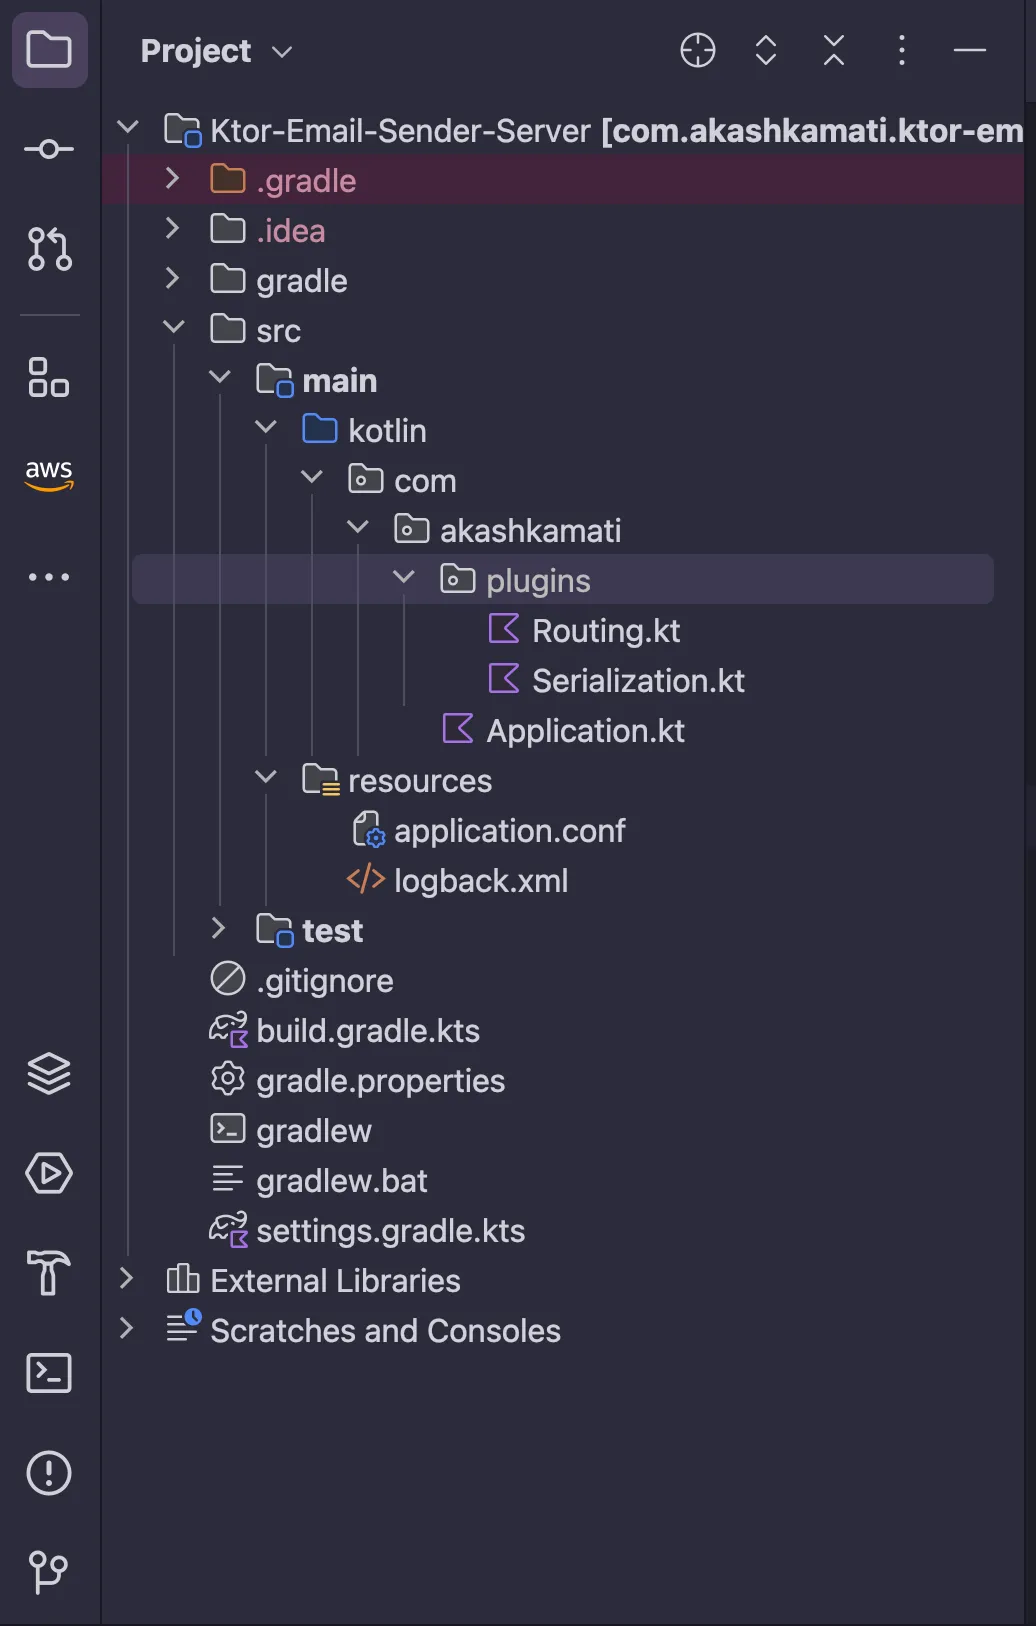
In Ktor, each feature such as serialization, routing, and authentication is integrated into the plugins directory. The resources directory can be used for all static resources. Additionally, the application.conf file contains server configurations like ports and hosts. If we hadn’t chosen the HOCON file format during the initial code generation, we wouldn’t have encountered the application.conf file.
Now, open the Serialization.kt file. You may notice a routing block within it. As we already have one defined in the Routing.kt file, we need to remove the routing block from Serialization.kt.
After removing routing block our Serialization.kt will look like,
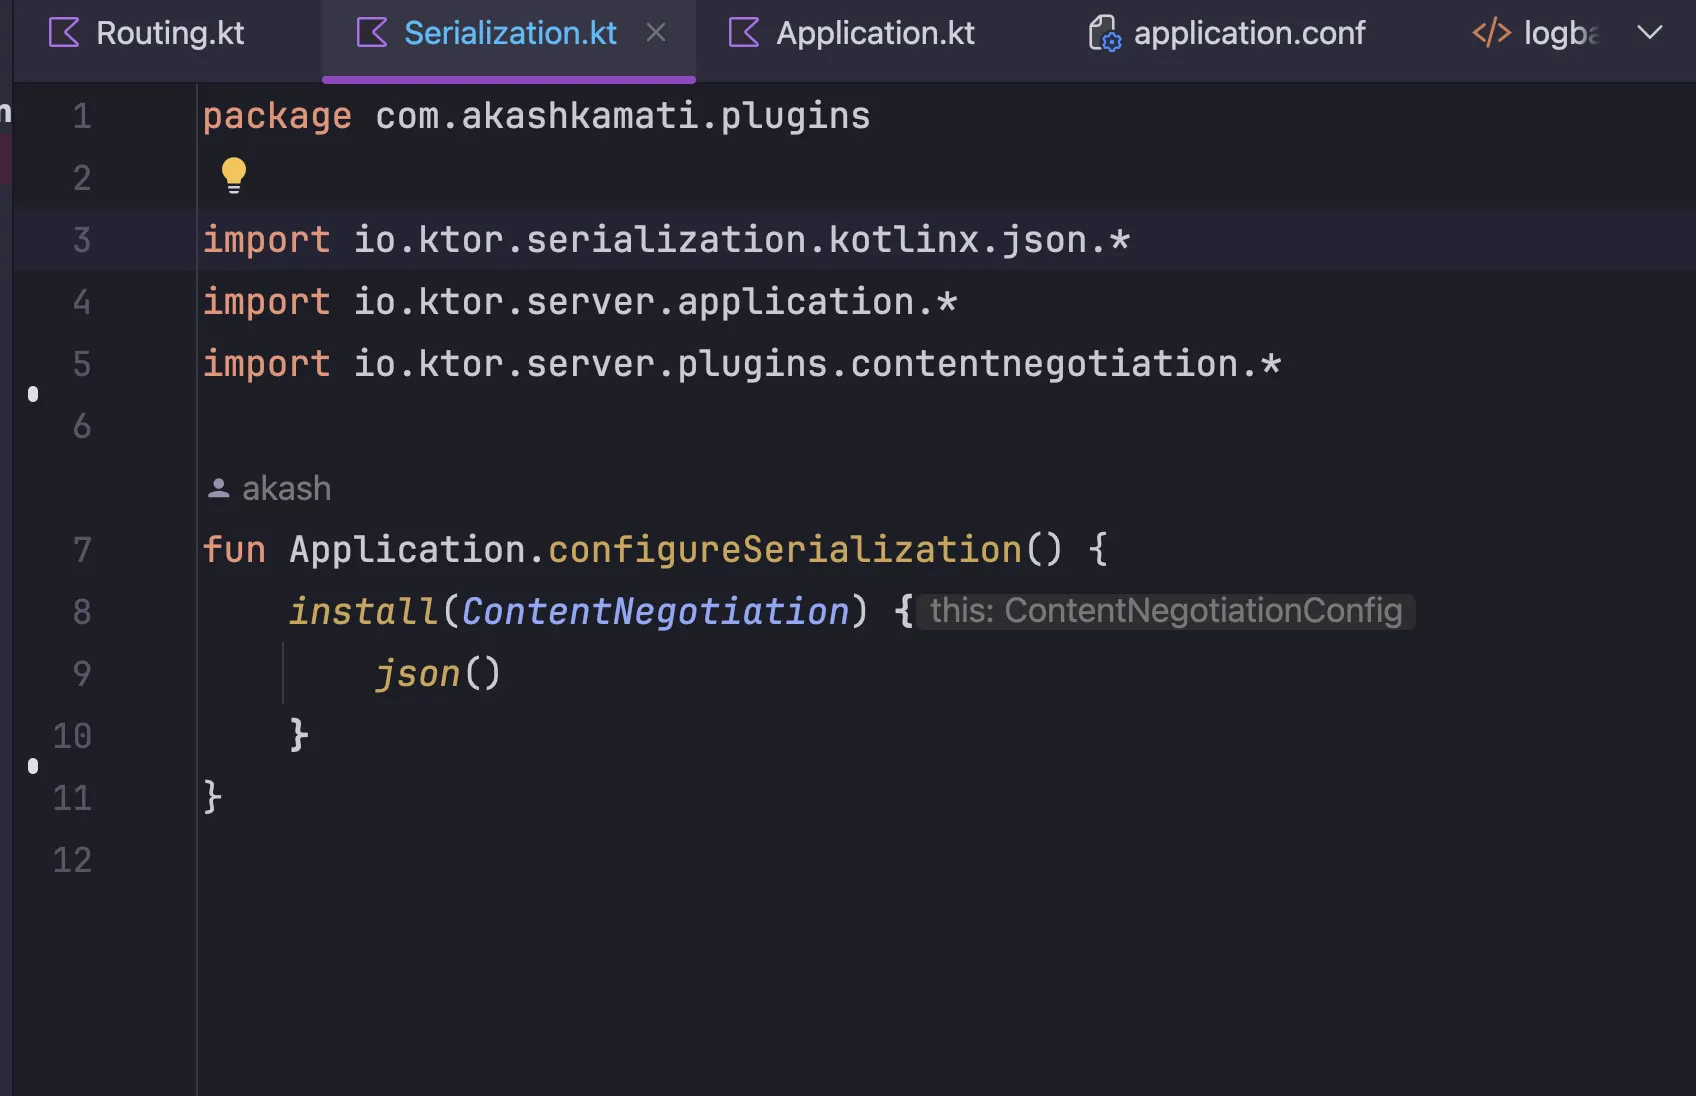
To initiate our server, navigate to the Application.kt file. Next to the main function, you’ll notice a play icon. Simply click on this icon to begin the server.
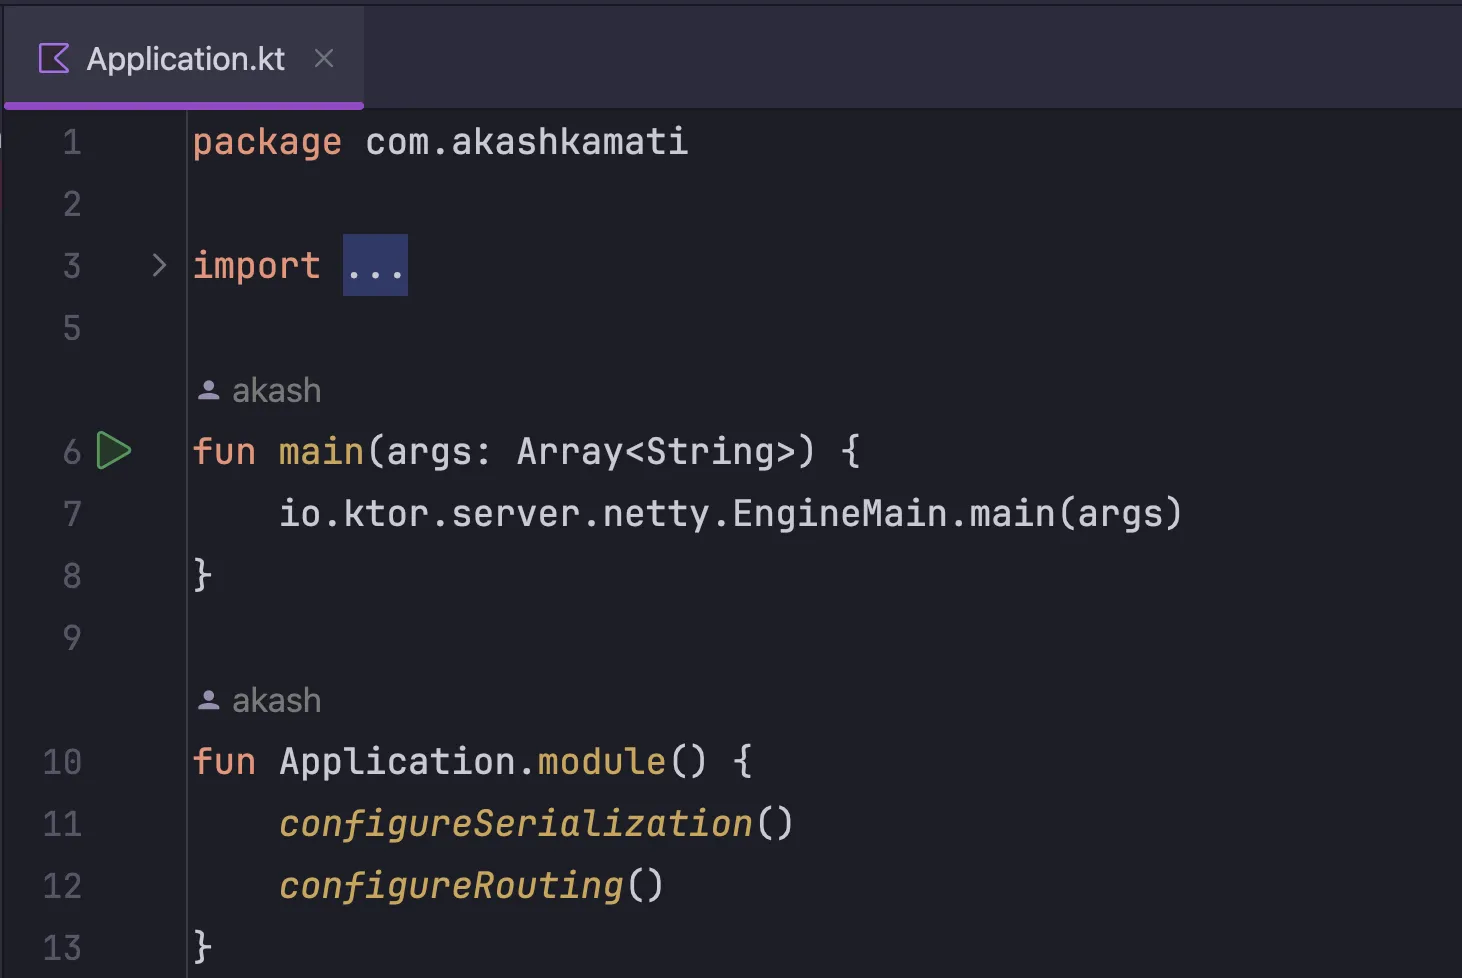
After initiating the server, we can open localhost:8080
in our browser.
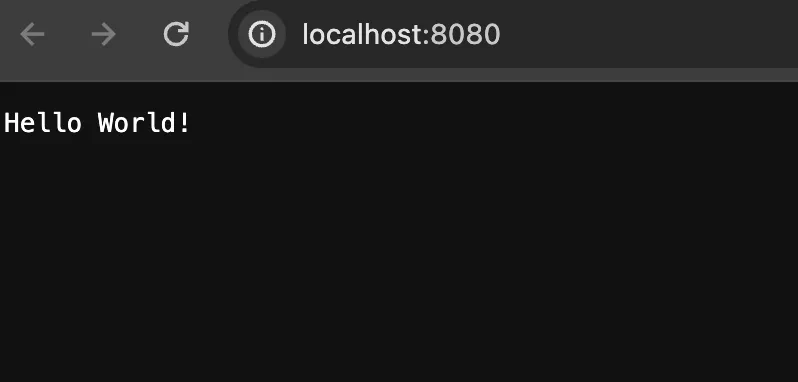
In our Routing.kt file, we currently just have one root route which respond with “Hello World!”
routing {
   get("/") {
      call.respondText("Hello World!")
   }
}
Getting started with code
Now, let’s create our project structure. We’ll start by adding four packages: data, domain, di and controllers. The data package will have sub-packages for email and repo, while the domain package will contain a repo sub-package. Similarly, the controllers package will include sub-packages for routes and serializers.
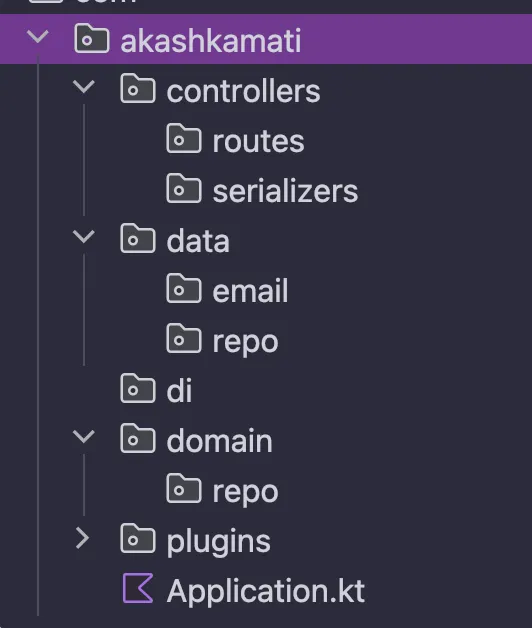
Now, let’s begin with the data layer. Add a data class named EmailData within the email sub-package.
email/data/EmailData.kt
data class EmailData(
    val emailFrom:String,
    val emailTo:String,
    val subject:String,
    val message:String
)
Additionally, within the same email package, let’s include an EmailService interface. email/data/EmailService.kt
interface EmailService {
    suspend fun sendEmail(data: EmailData):Boolean
}
Now, let’s implement this EmailService by adding the DefaultEmailService class within the same email sub-package. We introduced the interface to depend on abstraction rather than concrete implementation. This design choice makes our code testable, as we can incorporate different variants of the EmailService.
class DefaultEmailService : EmailService {
    override suspend fun sendEmail(data: EmailData): Boolean {

    }
}
To send emails, we’ll utilize the Simple Java Mail Library
To add the Simple Java Mail dependency, navigate to build.gradle.kts and include this dependency and then sync. Feel free to use the latest version if it differs from the one I’ve specified.
implementation("org.simplejavamail:simple-java-mail:8.6.3")
Now, let’s return to the DefaultEmailService class and implement a constructor that accepts a mailer parameter. We will later pass this mailer parameter when creating an object for DefaultEmailService using Koin dependency injection
class DefaultEmailService(
    private val mailer: Mailer
) : EmailService
Now, let’s proceed with implementing our sendEmail function. The complete implementation of DefaultEmailService will resemble the following code snippet
package com.akashkamati.data.email

import org.simplejavamail.api.mailer.Mailer
import org.simplejavamail.email.EmailBuilder

class DefaultEmailService(
    private val mailer: Mailer
) : EmailService {
    override suspend fun sendEmail(data: EmailData): Boolean {
        val userName = data.emailTo.split("@")[0]
        val email = EmailBuilder.startingBlank()
            .from("e.g username, verify, etc.", data.emailFrom)
            .to(userName, data.emailTo)
            .withSubject(data.subject)
            .withPlainText(data.message)
            .buildEmail()
        return try {
            mailer.sendMail(email)
            true
        }catch (e:Exception){
            e.printStackTrace()
            false
        }
    }
}
Now let’s break down sendEmail function,
The line below retrieves the username of the recipient for whom we’re sending the email. Alternatively, you can use the full name. However, in this case, we retrieve the username from the email by splitting it into two parts at the ’@’ symbol and extracting the element at the first index from the resulting list.
val userName = data.emailTo.split("@")[0]
The line below will create an email builder which has lots of customization.
val email = EmailBuilder.startingBlank()
The following code snippet adds the ‘from’ email option. Typically, for the first parameter, we use a string like the username, or for very specific purposes like OTP mails, we can use text like ‘verify’. As for the second parameter, it’s crucial to use the same email that we’ll later use to set up our SMTP server. To prevent errors and ensure consistency, consider creating a constant for this email, as it will be used in another place later in this tutorial.
.from("Your Email Username", data.emailFrom)
Similarly, we can specify the ‘to’ option. Use ‘userName’ as the first parameter and ‘emailTo’ as the second parameter.
.to(userName, data.emailTo)
Likewise, we can include the subject and message body, along with many other options available like sending html template, and other use cases mentioned in the official documentation.
.withSubject(data.subject)
.withPlainText(data.message)
.buildEmail()
The following code attempts to send the email using the mailer added to the class constructor. If successful, it returns true; otherwise, it prints the stack trace and returns false.
return try {
    mailer.sendMail(email)
    true
}catch (e:Exception){
    e.printStackTrace()
    false
}
And that concludes the implementation of our EmailService.
Before proceeding to create our repository, let’s first add request and response serializer data classes, which we’ll be passing to our repository.
Create a data class with name SendEmailRequestData within controllers/serializers package.
controllers/serializers/SendEmailRequestData.kt
package com.akashkamati.controllers.serializers

import kotlinx.serialization.Serializable

@Serializable
data class SendEmailRequestData(
    val email:String,
    val subject:String,
    val message:String
)
Similarly, data class with name SendEmailResponse within controllers/serializers package.
controllers/serializers/SendEmailResponse.kt
package com.akashkamati.controllers.serializers

import kotlinx.serialization.Serializable

@Serializable
data class SendEmailResponse(
    val status:Int,
    val success:Boolean,
    val message:String
)
These two data classes handle the serialization and deserialization of JSON data.
Now, let’s create a MainRepo interface within the repo package in the domain package. This interface will include a function named sendEmail, which will take the SendEmailRequestData as a parameter and return SendEmailResponse.
domain/repo/MainRepo.kt
package com.akashkamati.domain.repo

import com.akashkamati.controllers.serializers.SendEmailRequestData
import com.akashkamati.controllers.serializers.SendEmailResponse

interface MainRepo {
    suspend fun sendEmail(data:SendEmailRequestData):SendEmailResponse
}
Let’s create implentation of this interface within repo of data package.
data/repo/MainRepoImpl.kt
package com.akashkamati.data.repo

import com.akashkamati.controllers.serializers.SendEmailRequestData
import com.akashkamati.controllers.serializers.SendEmailResponse
import com.akashkamati.domain.repo.MainRepo

class MainRepoImpl : MainRepo {
    override suspend fun sendEmail(data: SendEmailRequestData): SendEmailResponse {
        TODO("Not yet implemented")
    }
}
Now, let’s implement the sendEmail function. Before that, we’ll need to add a constructor for the emailService. Here we are passing EmailService instead of DefaultEmailService to stick to the principle of dependency on abstraction rather than concrete implementation. This design choice allows for greater flexibility and easier maintenance of the codebase.
class MainRepoImpl(
    private val emailService: EmailService
) : MainRepo
Let’s proceed with implementing the sendEmail function. Later, we will revisit to replace the emailFrom parameter.
override suspend fun sendEmail(data: SendEmailRequestData): SendEmailResponse {
    val result = emailService.sendEmail(
        EmailData(
            emailTo = data.email,
            subject = data.subject,
            message = data.message,
            emailFrom = "Email From SMTP Server"
        )
    )
    return SendEmailResponse(
        success = result,
        status = if (result) 200 else 400,
        message = if (result) "Successfully sent email" else "Failed to send email"
    )
}
In the above function, we’ve invoked the sendEmail function from our emailService, which was previously created, passing the EmailData from the request data. We then return a SendEmailResponse based on the result obtained while sending the email. If the result is true, we return success with a 200 status; otherwise, we return a bad request with a status of 400.
Here is complete code for MainRepoImpl:
package com.akashkamati.data.repo

import com.akashkamati.controllers.serializers.SendEmailRequestData
import com.akashkamati.controllers.serializers.SendEmailResponse
import com.akashkamati.data.email.EmailData
import com.akashkamati.data.email.EmailService
import com.akashkamati.domain.repo.MainRepo

class MainRepoImpl(
    private val emailService: EmailService
) : MainRepo {
    override suspend fun sendEmail(data: SendEmailRequestData): SendEmailResponse {
        val result = emailService.sendEmail(EmailData(
            emailTo = data.email,
            subject = data.subject,
            message = data.message,
            emailFrom = "Email From SMTP Server"
        ))
        return SendEmailResponse(
            success = result,
            status = if (result) 200 else 400,
            message = if (result) "Successfully sent email" else "Failed to send email"
        )
    }
}
Let’s proceed to create a file named SendEmailRoutes in the routes package within the controllers package.
In Ktor, we primarily work with extension functions. The following code snippet demonstrates a simple extension function that we will later invoke from our main Routing block.
controllers/routes/SendEmailRoutes.kt
package com.akashkamati.controllers.routes

import io.ktor.server.routing.*

fun Route.sendEmailRoutes(){
}
Let’s include a POST request with the route /send-email.
fun Route.sendEmailRoutes(){

    post("send-email") {

    }
}
This function will take mainRepo as parameter
fun Route.sendEmailRoutes(mainRepo: MainRepo){

    post("send-email") {

    }
}
Complete code for this route will look like.
package com.akashkamati.controllers.routes

import com.akashkamati.controllers.serializers.SendEmailRequestData
import com.akashkamati.controllers.serializers.SendEmailResponse
import com.akashkamati.domain.repo.MainRepo
import io.ktor.http.*
import io.ktor.server.application.*
import io.ktor.server.request.*
import io.ktor.server.response.*
import io.ktor.server.routing.*

fun Route.sendEmailRoutes(mainRepo: MainRepo){

    post("send-email") {
        val requestData = call.receiveNullable<SendEmailRequestData>()
            ?: return@post call.respond(
                HttpStatusCode.BadRequest,
                SendEmailResponse(
                    status = 400,
                    success = false,
                    message = "Missing request params"
                )
            )
        val responseData = mainRepo.sendEmail(requestData)
        call.respond(
            if (responseData.success) HttpStatusCode.OK else HttpStatusCode.BadRequest,
            responseData
        )
    }

}
Now let’s break it down, This code snippet retrieves the JSON data from the request and converts it to the SendEmailRequestData data class. If the data is null, we will respond with a status code of 400, indicating a BadRequest.
val requestData = call.receiveNullable<SendEmailRequestData>()
        ?: return@post call.respond(
            HttpStatusCode.BadRequest,
            SendEmailResponse(
                status = 400,
                success = false,
                message = "Missing request params"
            )
        )
This responseData will be returned by sendEmail function from our repository.
val responseData = mainRepo.sendEmail(requestData)
Now, let’s respond with the responseData and status code. If sendEmail fails, we will return a BadRequest status; otherwise, we’ll return an OK status along with the data.
call.respond(
        if (responseData.success) HttpStatusCode.OK else HttpStatusCode.BadRequest,
        responseData
    )
Let’s head over to Routing.kt file within plugins, it looks like
package com.akashkamati.plugins

import io.ktor.server.application.*
import io.ktor.server.response.*
import io.ktor.server.routing.*

fun Application.configureRouting() {
    routing {
        get("/") {
            call.respondText("Hello World!")
        }
    }
}
Let’s remove this deafult get request as well as invoke our sendEmailRoutes extension function.
fun Application.configureRouting() {
    routing {
        sendEmailRoutes()
    }
}
But how about passing the mainRepo parameter. For that we need to add koin to our project.
Koin is essentially a dependency injection framework that offers multiplatform support, allowing you to utilize Koin for any platform you target.
To add Koin to our project simply add below to build.gradle.kts. And then sync your project.Feel free to use the recent version of koin
implementation("io.insert-koin:koin-core-coroutines:3.4.1")
implementation("io.insert-koin:koin-ktor:3.4.1")
implementation("io.insert-koin:koin-logger-slf4j:3.4.1")
Optionally, you can also add koin_version to gradle.properties file for consistency.
To inject mainRepo, we can utilize the following code snippet:
val mainRepo by inject<MainRepo>()
complete code for the routing will look like this:
package com.akashkamati.plugins

import com.akashkamati.controllers.routes.sendEmailRoutes
import com.akashkamati.domain.repo.MainRepo
import io.ktor.server.application.*
import io.ktor.server.routing.*
import org.koin.ktor.ext.inject


fun Application.configureRouting() {

    val mainRepo by inject<MainRepo>()

    routing {
        sendEmailRoutes(mainRepo)
    }
}
Now let’s head over to di package and create a file MainModule.kt.
di/MainModule.kt
package com.akashkamati.di

import org.koin.dsl.module

val mainModule = module {


}
Let’s start with MainRepo dependency,
 single<MainRepo>{
    MainRepoImpl(
        emailService =
    )
}
But you’ve already noticed it needs EmailService. So let’s provide dependency for EmailService
single<EmailService> {
    DefaultEmailService(
        mailer =
    )
}
Before adding the Mailer dependency, let’s create an AppSecrets object in our root package, where Application.kt is present. Alternatively, you can use environment variables for this purpose.
AppSecrets.kt
package com.akashkamati

object AppSecrets {
    const val SMTP_SERVER_HOST = ""
    const val SMTP_SERVER_PORT = 0
    const val SMTP_SERVER_USER_NAME = ""
    const val SMTP_SERVER_PASSWORD = ""
    const val EMAIL_FROM = ""
}
We will later revisit this file to update these values.
Now let’s provide Mailer dependency as well.
 single<Mailer> {
    MailerBuilder
        .withSMTPServer(AppSecrets.SMTP_SERVER_HOST, AppSecrets.SMTP_SERVER_PORT)
        .withTransportStrategy(TransportStrategy.SMTP_TLS)
        .withSMTPServerUsername(AppSecrets.SMTP_SERVER_USER_NAME)
        .withSMTPServerPassword(AppSecrets.SMTP_SERVER_PASSWORD)
        .buildMailer()

 }
Now let’s break it down,
single<Mailer>:This line tells Koin to provide a single instance of the Mailer class. MailerBuilder…buildMailer(): This part of the code sets up the configuration for the mailer using the MailerBuilder provided by the Simple Java Mail library. Here’s what each method does:
- withSMTPServer: Specifies the SMTP server host and port.
- withTransportStrategy: Specifies the transport strategy, in this case, SMTP with TLS encryption.
- withSMTPServerUsername and withSMTPServerPassword: Provide the username and password for SMTP server authentication.
Now that’s it for Mailer now let’s pass Mailer dependency to EmailService
single<EmailService> {
    DefaultEmailService(
        mailer = get<Mailer>()
    )
}
Similarly, let’s pass EmailService dependency to MainRepo
single<MainRepo>{
    MainRepoImpl(
        emailService = get<EmailService>()
    )
}
After these changes MainModule would look something like this:
package com.akashkamati.di

import com.akashkamati.AppSecrets
import com.akashkamati.data.email.DefaultEmailService
import com.akashkamati.data.email.EmailService
import com.akashkamati.data.repo.MainRepoImpl
import com.akashkamati.domain.repo.MainRepo
import org.koin.dsl.module
import org.simplejavamail.api.mailer.Mailer
import org.simplejavamail.api.mailer.config.TransportStrategy
import org.simplejavamail.mailer.MailerBuilder

val mainModule = module {

    single<Mailer> {
        MailerBuilder
            .withSMTPServer(AppSecrets.SMTP_SERVER_HOST, AppSecrets.SMTP_SERVER_PORT)
            .withTransportStrategy(TransportStrategy.SMTP_TLS)
            .withSMTPServerUsername(AppSecrets.SMTP_SERVER_USER_NAME)
            .withSMTPServerPassword(AppSecrets.SMTP_SERVER_PASSWORD)
            .buildMailer()
    }

    single<EmailService> {
        DefaultEmailService(
            mailer = get<Mailer>()
        )
    }

    single<MainRepo>{
        MainRepoImpl(
            emailService = get<EmailService>()
        )
    }

}
We are almost done with dependency injection. Lastly we need to register this mainModule. For that let’s create a file named Koin within our plugins package.
plugins/Koin.kt
package com.akashkamati.plugins

import io.ktor.server.application.*

fun Application.configureKoin(){

}
We will be invoking this extension function from our main application scope. So to register module. we can do something like
koin {
    modules(mainModule)
}
modules can take n number of modules.In this project we have only one module but in most of the production grade application we are going to have more than one module.
Complete code for Koin.kt file will look like:
package com.akashkamati.plugins

import com.akashkamati.di.mainModule
import io.ktor.server.application.*
import org.koin.ktor.plugin.koin

fun Application.configureKoin(){
    koin {
        modules(mainModule)
    }
}
Now head over to Application.Kt file,then invoke this configureKoin function.
fun Application.module() {
    configureKoin()
    configureSerialization()
    configureRouting()
}
Complete code for Application.kt looks like:
package com.akashkamati

import com.akashkamati.plugins.*
import io.ktor.server.application.*

fun main(args: Array<String>) {
    io.ktor.server.netty.EngineMain.main(args)
}

fun Application.module() {
    configureKoin()
    configureSerialization()
    configureRouting()
}
Now, all that’s left is to update the SMTP credentials, and our application will be ready to run.
Getting SMTP credentials
-
Go to Google Account
-
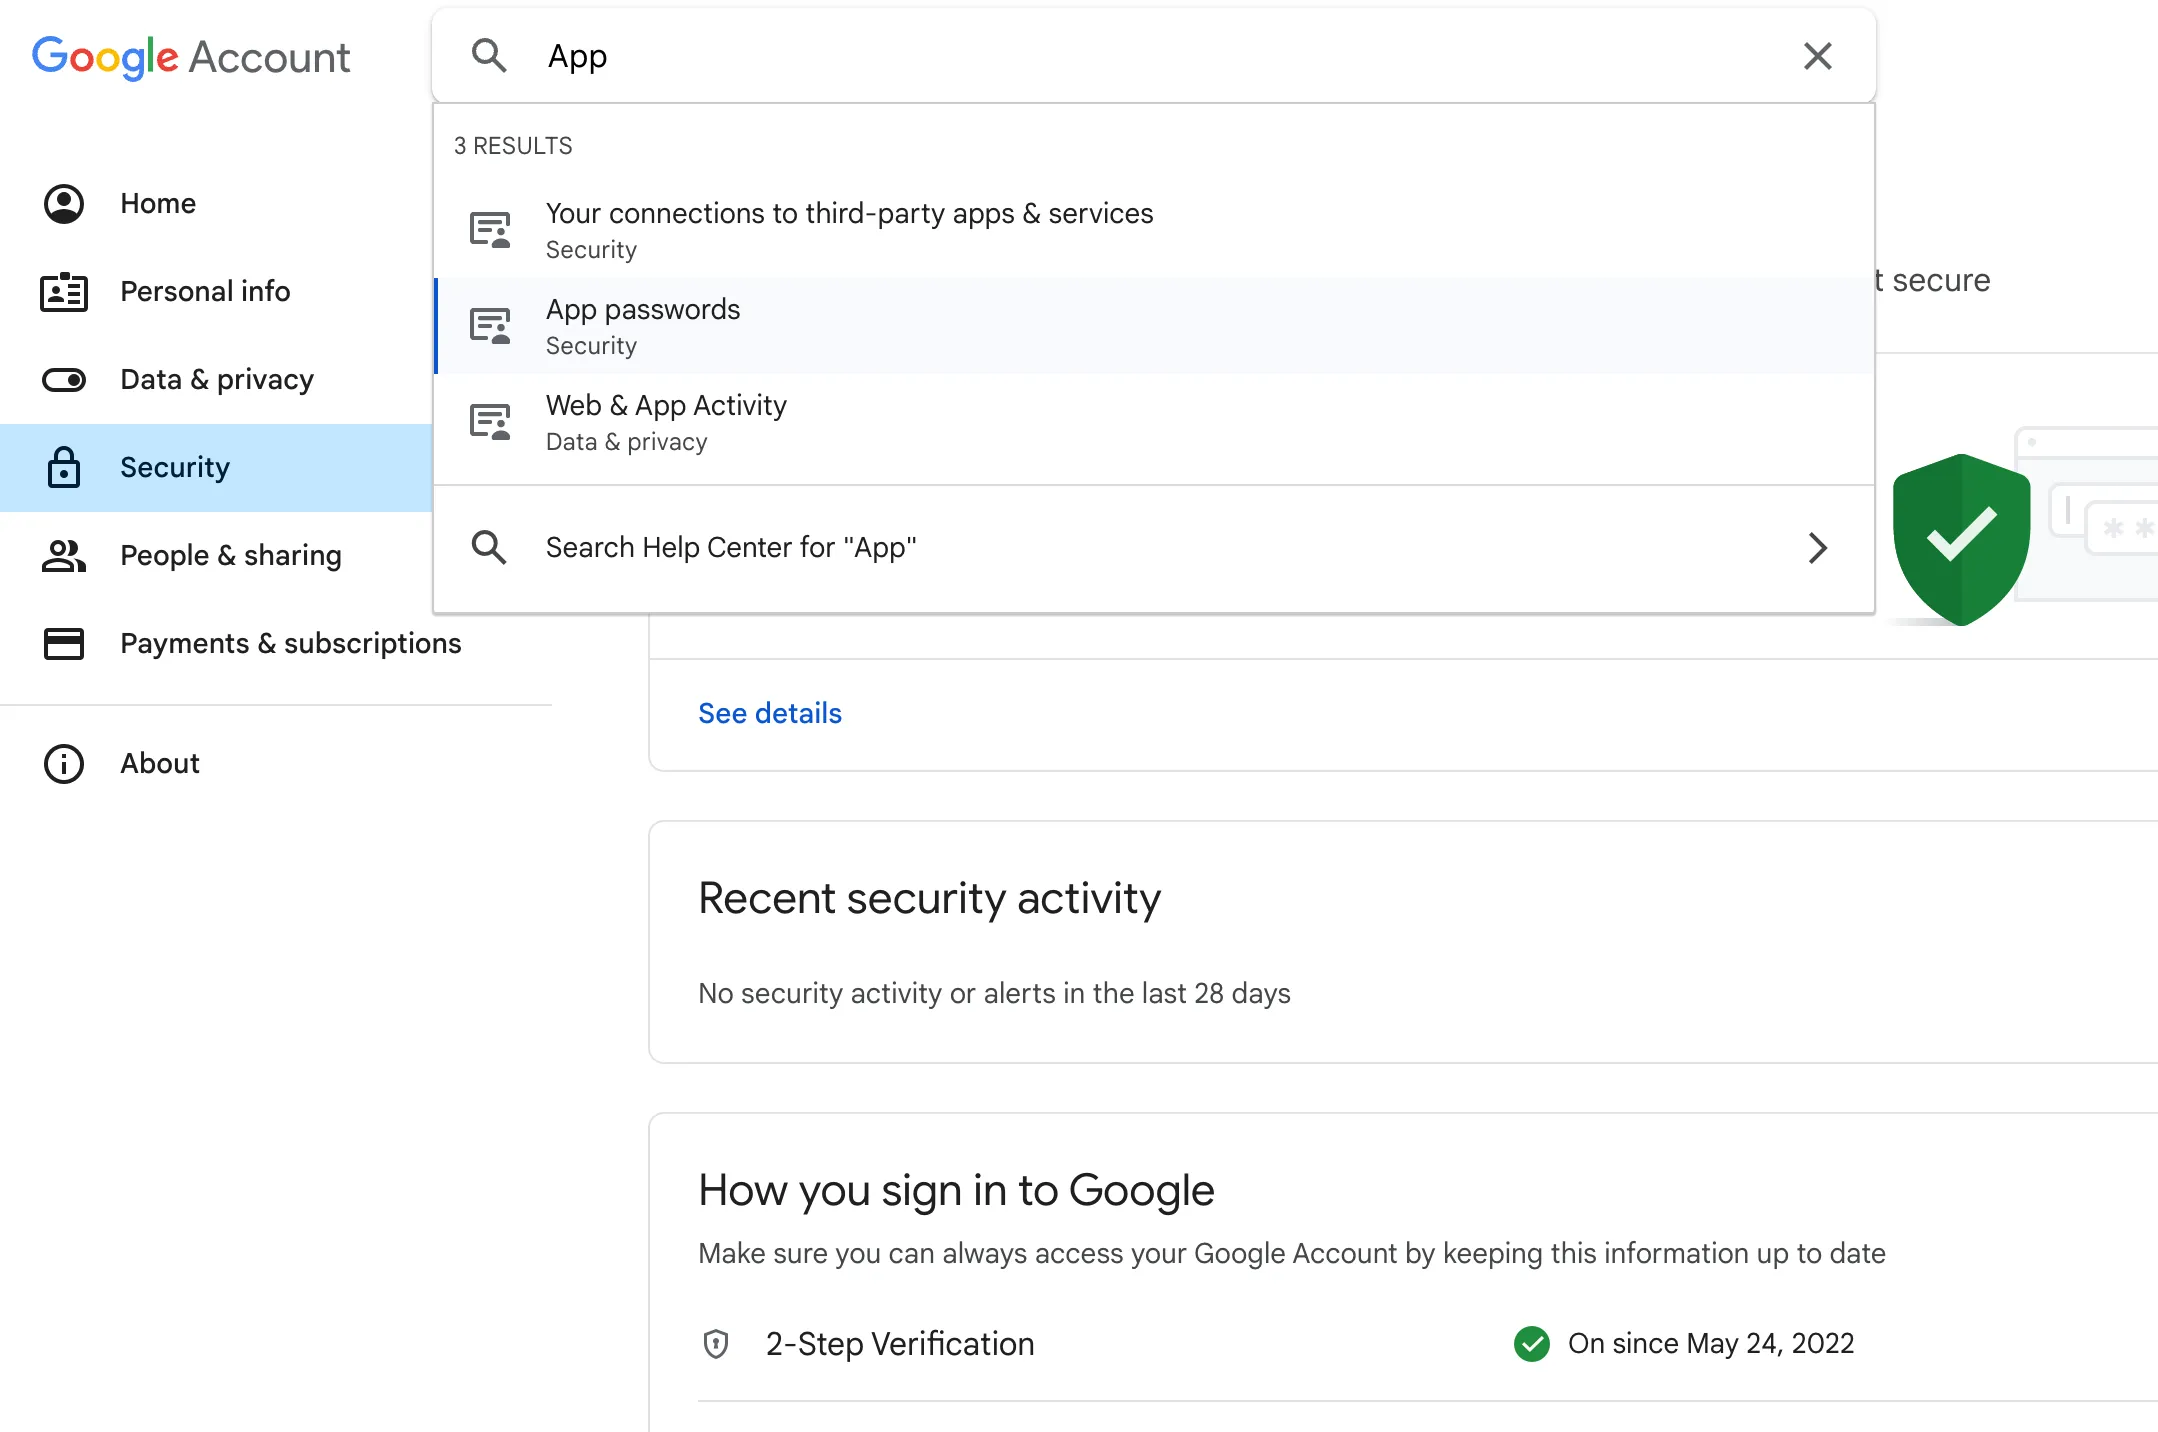
We can find the App Password by searching in the top search bar.
-
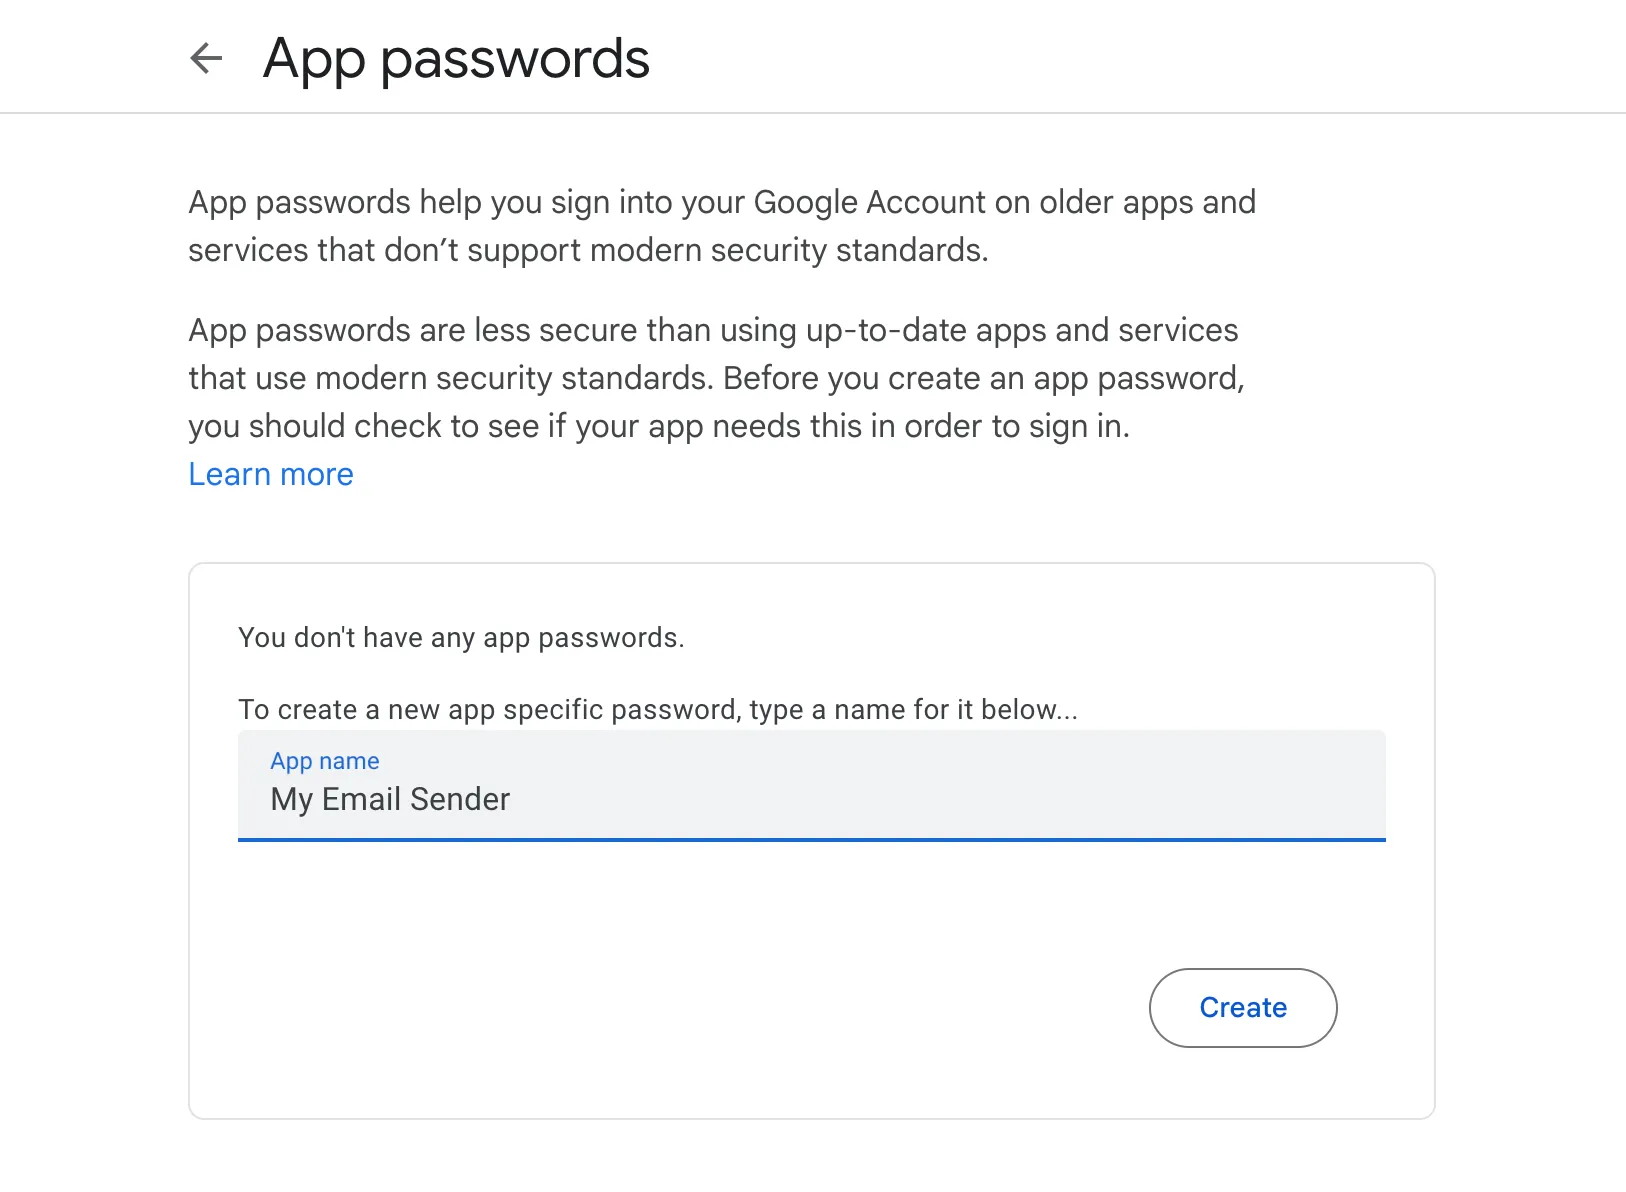
Click on App Passwords and provide a name for your app. Then, click on the Create button.
-
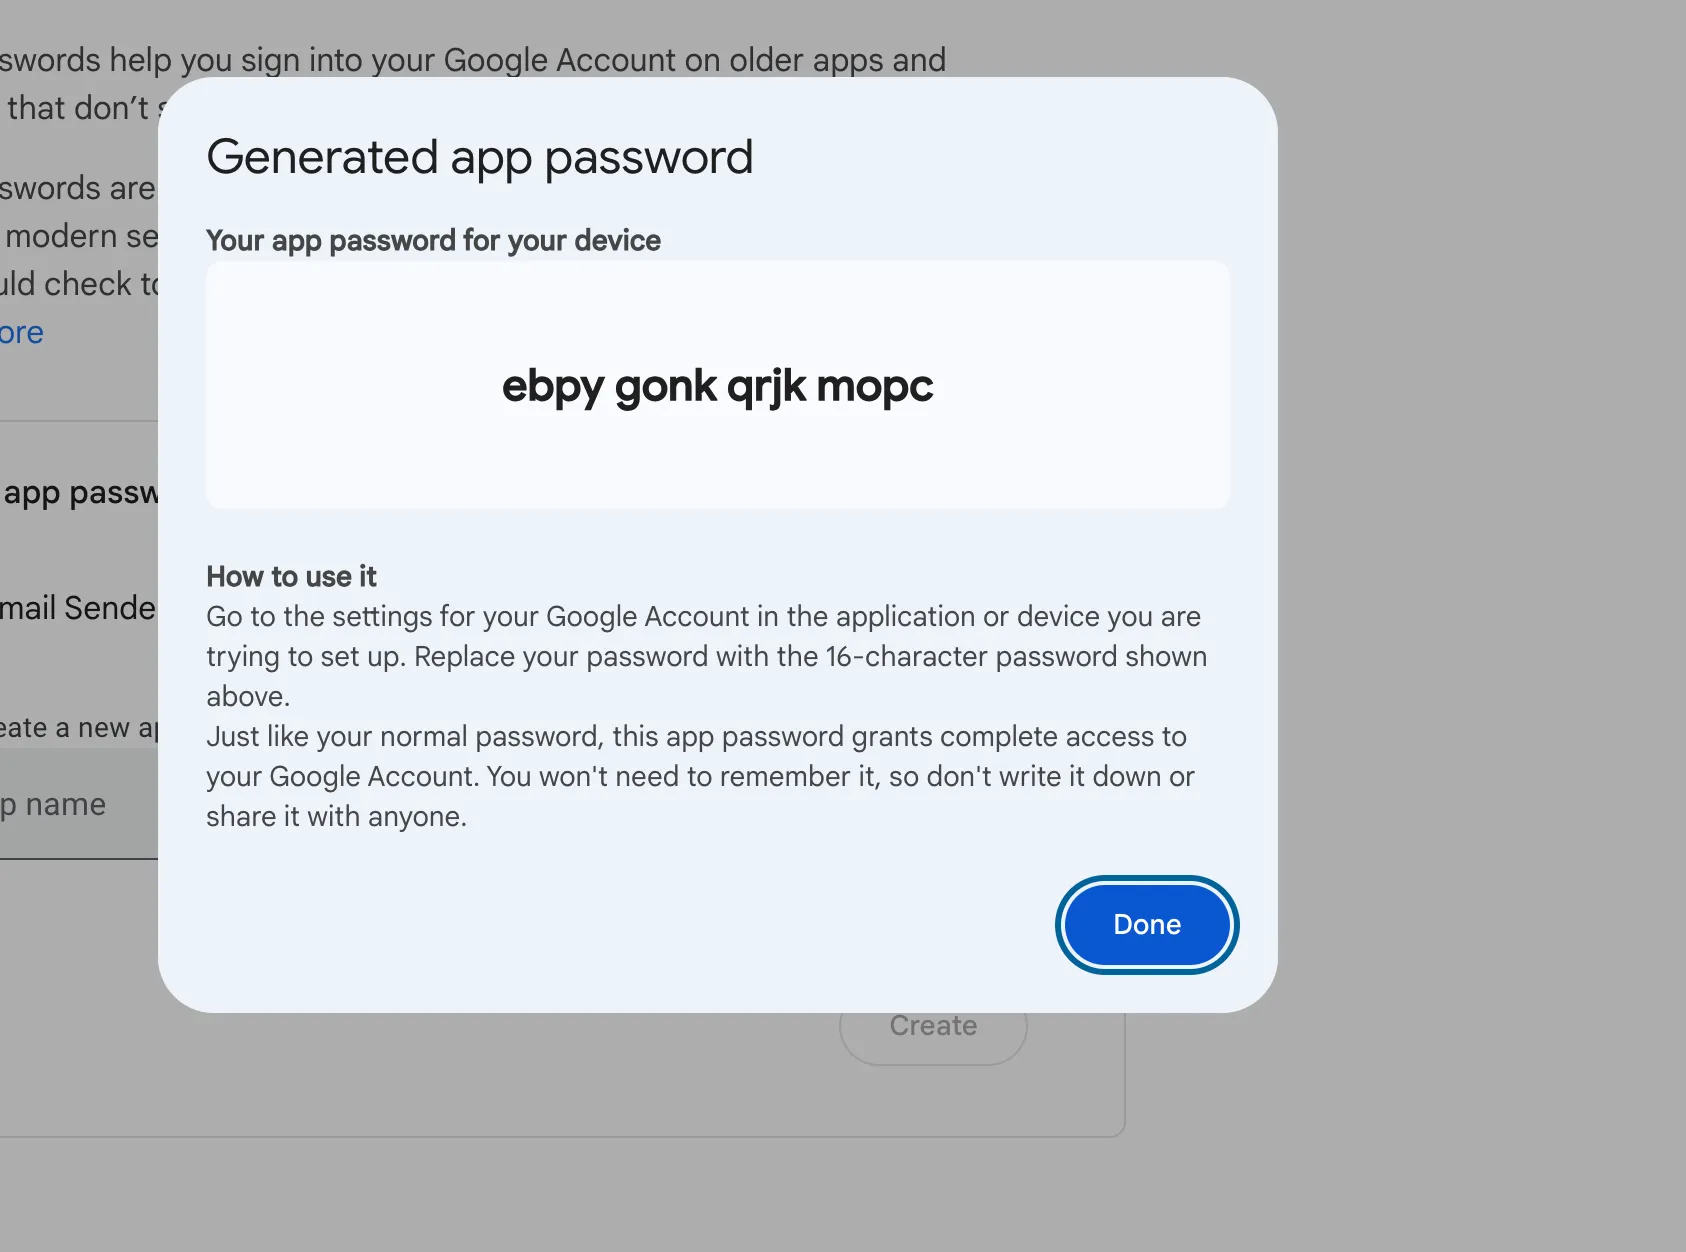
Make sure to copy your app password and click on Done. Please note that the password shown in the image is a dummy and invalid. Do not use it.
Now let’s get back to AppSecrets.kt file and update the values.
package com.akashkamati

object AppSecrets {
    const val SMTP_SERVER_HOST = "smtp.gmail.com" // host for gmail smtp
    const val SMTP_SERVER_PORT = 587 // since we are using TLS
    const val SMTP_SERVER_USER_NAME = "your email used to generate app password" //[email protected]
    const val SMTP_SERVER_PASSWORD = "xxxx xxxx xxxx xxxx" // your 16 digit app password
    const val EMAIL_FROM = "your email used to generate app password" // [email protected]
}
Lastly update emailFrom within sendEmail function from data/repo/MainRepoImpl.kt
emailFrom = AppSecrets.EMAIL_FROM
so complete code for sendEmail function from data/repo/MainRepoImpl.kt looks like
override suspend fun sendEmail(data: SendEmailRequestData): SendEmailResponse {
    val result = emailService.sendEmail(EmailData(
        emailTo = data.email,
        subject = data.subject,
        message = data.message,
        emailFrom = AppSecrets.EMAIL_FROM
    ))
    return SendEmailResponse(
        success = result,
        status = if (result) 200 else 400,
        message = if (result) "Successfully sent email" else "Failed to send email"
    )
}
Now let’s run the application,
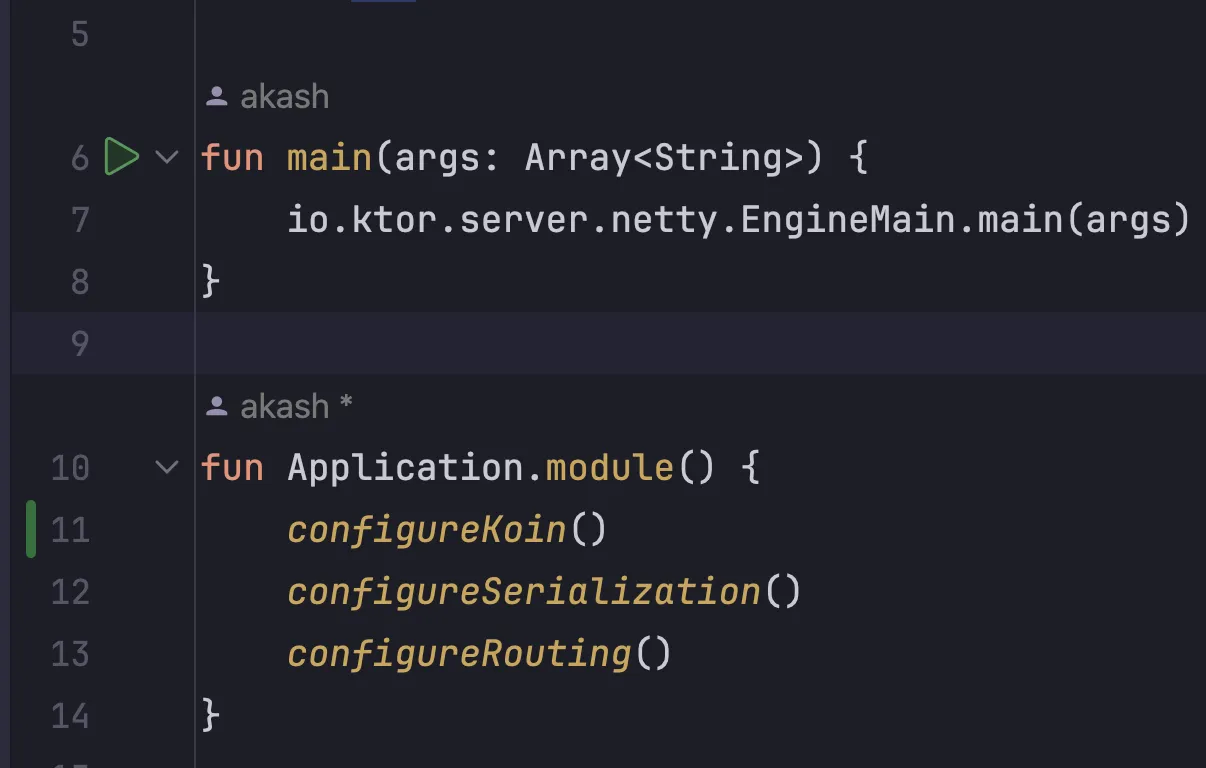
Let try it out using postman. Feel free to use any other tools of your choice.
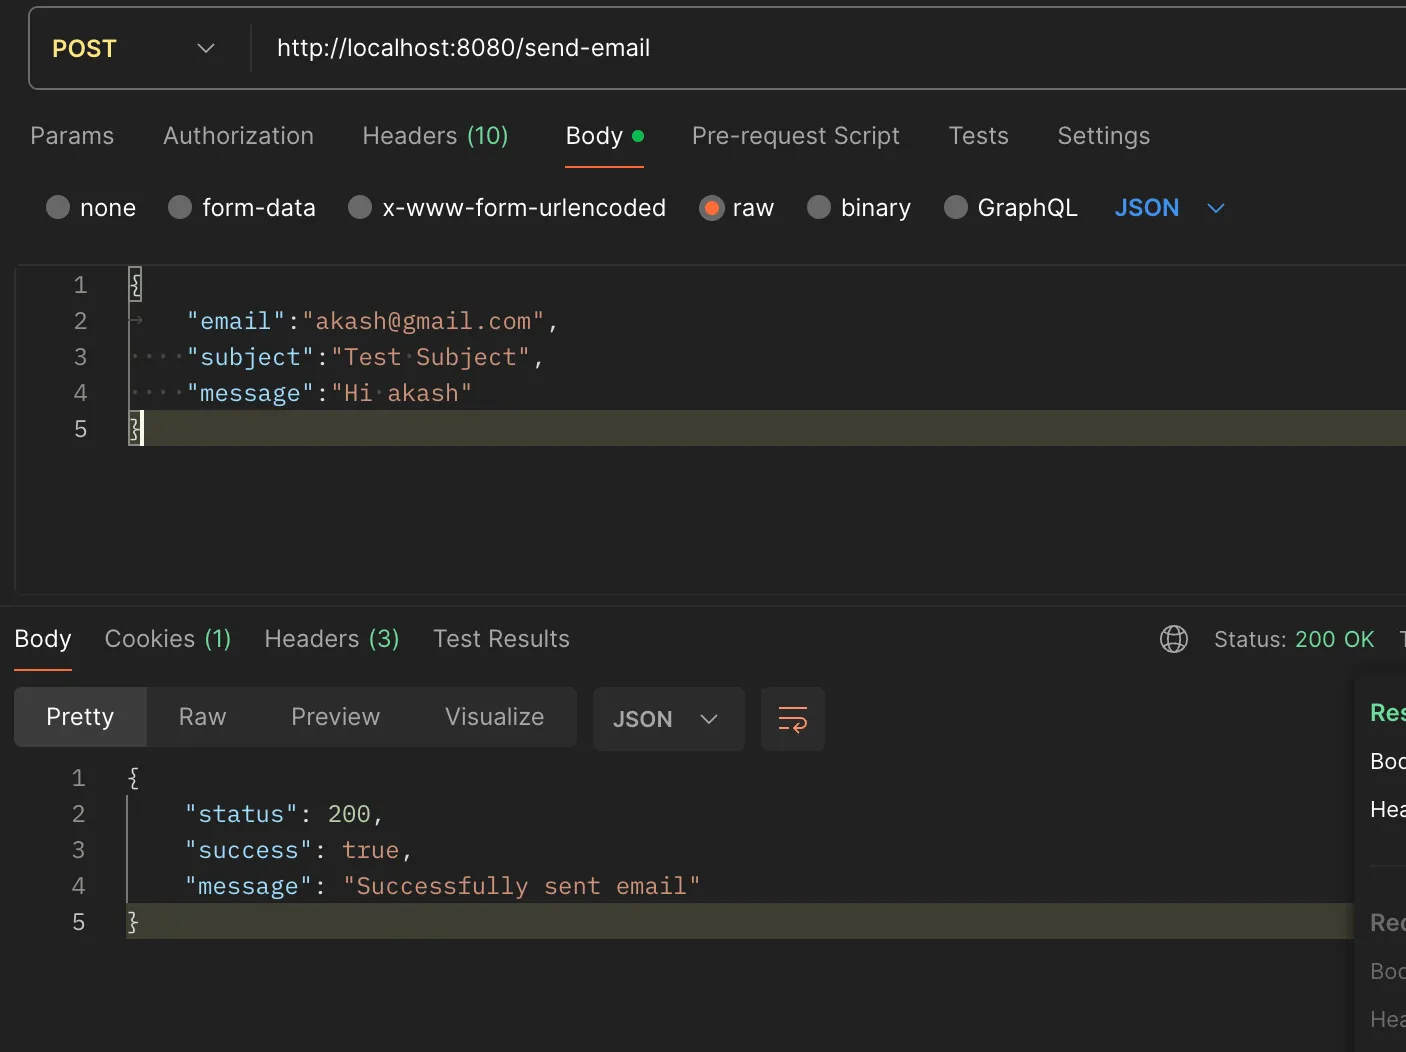
As we can observe, the email was successfully sent. Remember to pass the body as raw in JSON format. In Postman, there is an option to send JSON as raw, as shown in the image above.
You might want to try this api before deploying to remote machines. To enable the usage of this API on Android devices or any other clients that are connected across same network, we must modify the host parameter for this server application. This adjustment allows all clients on the same network to access the API.
You’ll need to retrieve the IP address assigned to your system from the Wi-Fi settings or by using commands like ipconfig or ifconfig, depending on your operating system.
If you’re using macOS, navigate to System Settings > Network. Then, click on Details for the network you’re currently connected to. This will display the IP address. So you can see that for me, it’s 192.168.29.205
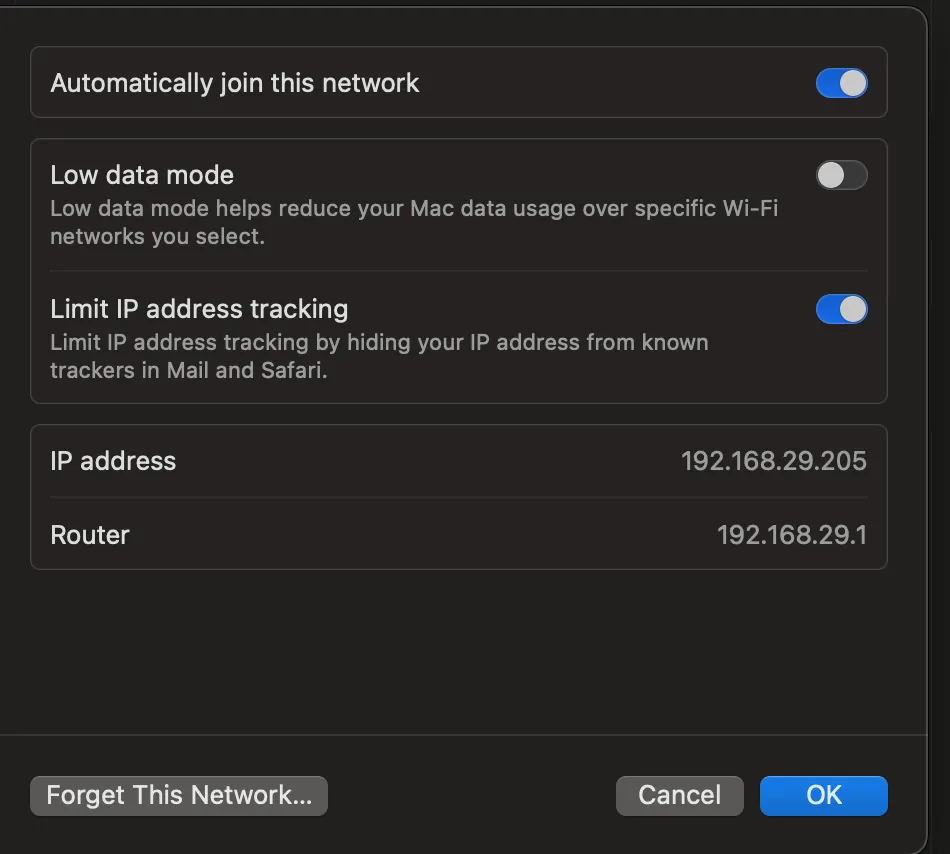
To change the host go to application.conf file within resources directory. And then add the host.
ktor {
    deployment {
        host = "192.168.29.205"
        port = 8080
        port = ${?PORT}
    }
    application {
        modules = [ com.akashkamati.ApplicationKt.module ]
    }
}
Now, if we rerun our application, it will be accessible at “ipaddress:8080”. Let’s try it out in Postman.
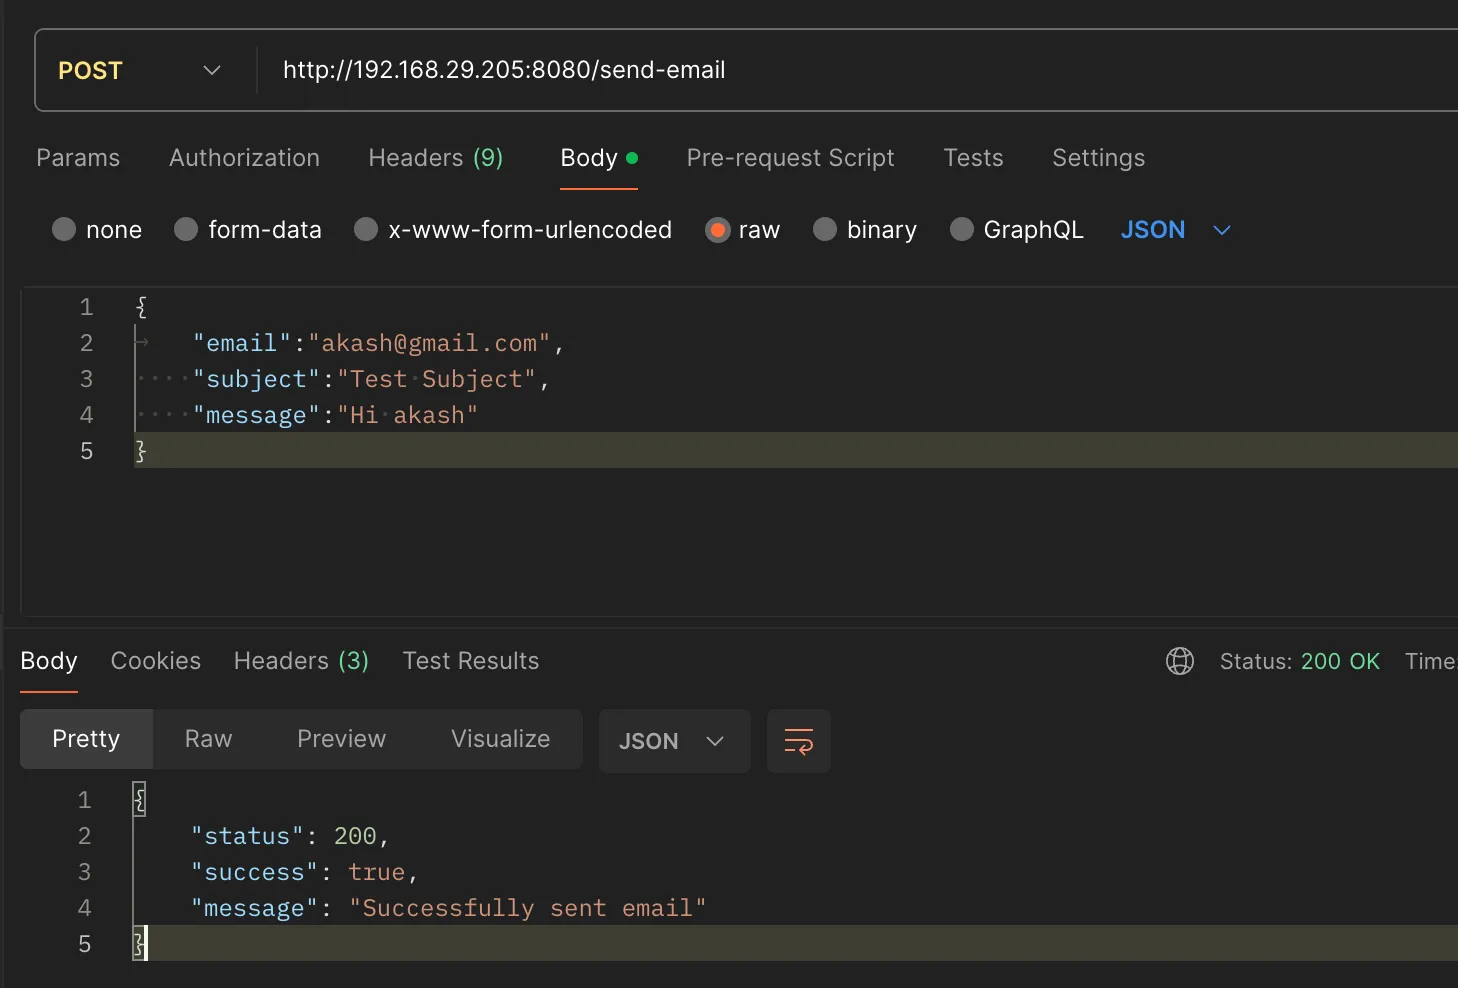
That concludes our backend implementation. Final Source Code
Feel free to incorporate email validation or any additional parameters to the route as needed.
